How to install OBS on Windows 10 and Live Stream on YouTube?
It’s 2020 and it’s surely not that Corona alone has gone viral — Live Streams are not only viral now but also have gone mainstream 📹
And when we talk about Live Streams, it will be a dismal injustice if we don’t talk about one of the biggest free and open source software for video recording and live streaming— OBS Studio!
In this tutorial, we will learn how to install and configure (minimal for now) it for a YouTube Stream. So, let’s begin!
Before we install OBS…
Yes, before installing OBS for YouTube, we need to ensure that our YouTube Live Streaming Feature is enabled.
Don’t worry if it isn’t, just follow the below steps and wait for 24 hours (Ahh! yes 😢) and it will be enabled if it isn’t already 😃
Steps to Activate Live Streaming your Account:
-
Login to your YouTube account.
-
Click the upload icon (it is like a camera with a plus in the center, in the upper right hand corner)
-
Click ‘Go Live.’
-
After clicking ‘Go Live’, YouTube will prompt you to activate your live streaming account.
-
Follow the Instructions.
-
It takes 24 hours to activate your account for live streaming. Once activated, you can go live instantly.
Installing OBS
Step 1: Very simple — just go to this link https://obsproject.com/ and select Windows. Your OBS-Studio Windows Installer will be downloaded.
Step 2: Run the installer and give it the permission to make changes. Now on the setup window click on next, accept the license agreement, select your installation path and click on install button.
Step 3: After the installation, OBS-Studio will open automatically. Carefully follow these steps as told below.
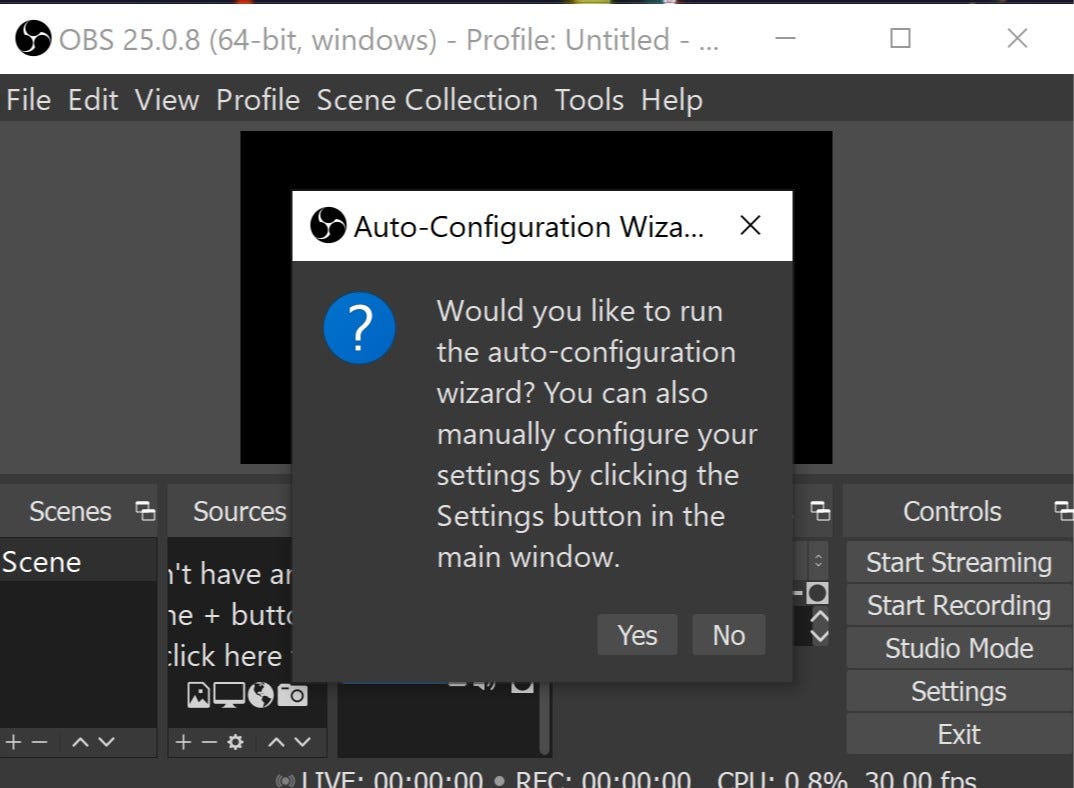
Run the Auto-Configuration Wizard by clicking the “Yes” button.
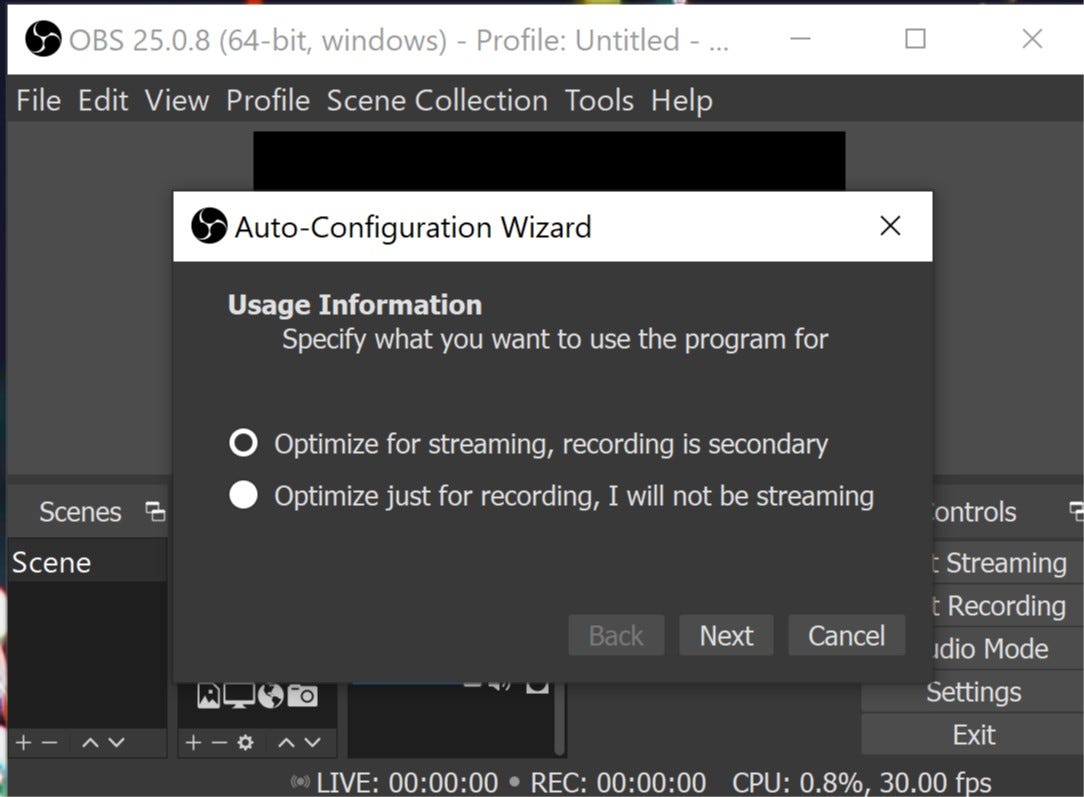
Step 4: Select ‘Optimize for streaming, recording is secondary option’ and click next.
Step 5: Continue with the default options visible and clicking “Next” till you encounter something like this.
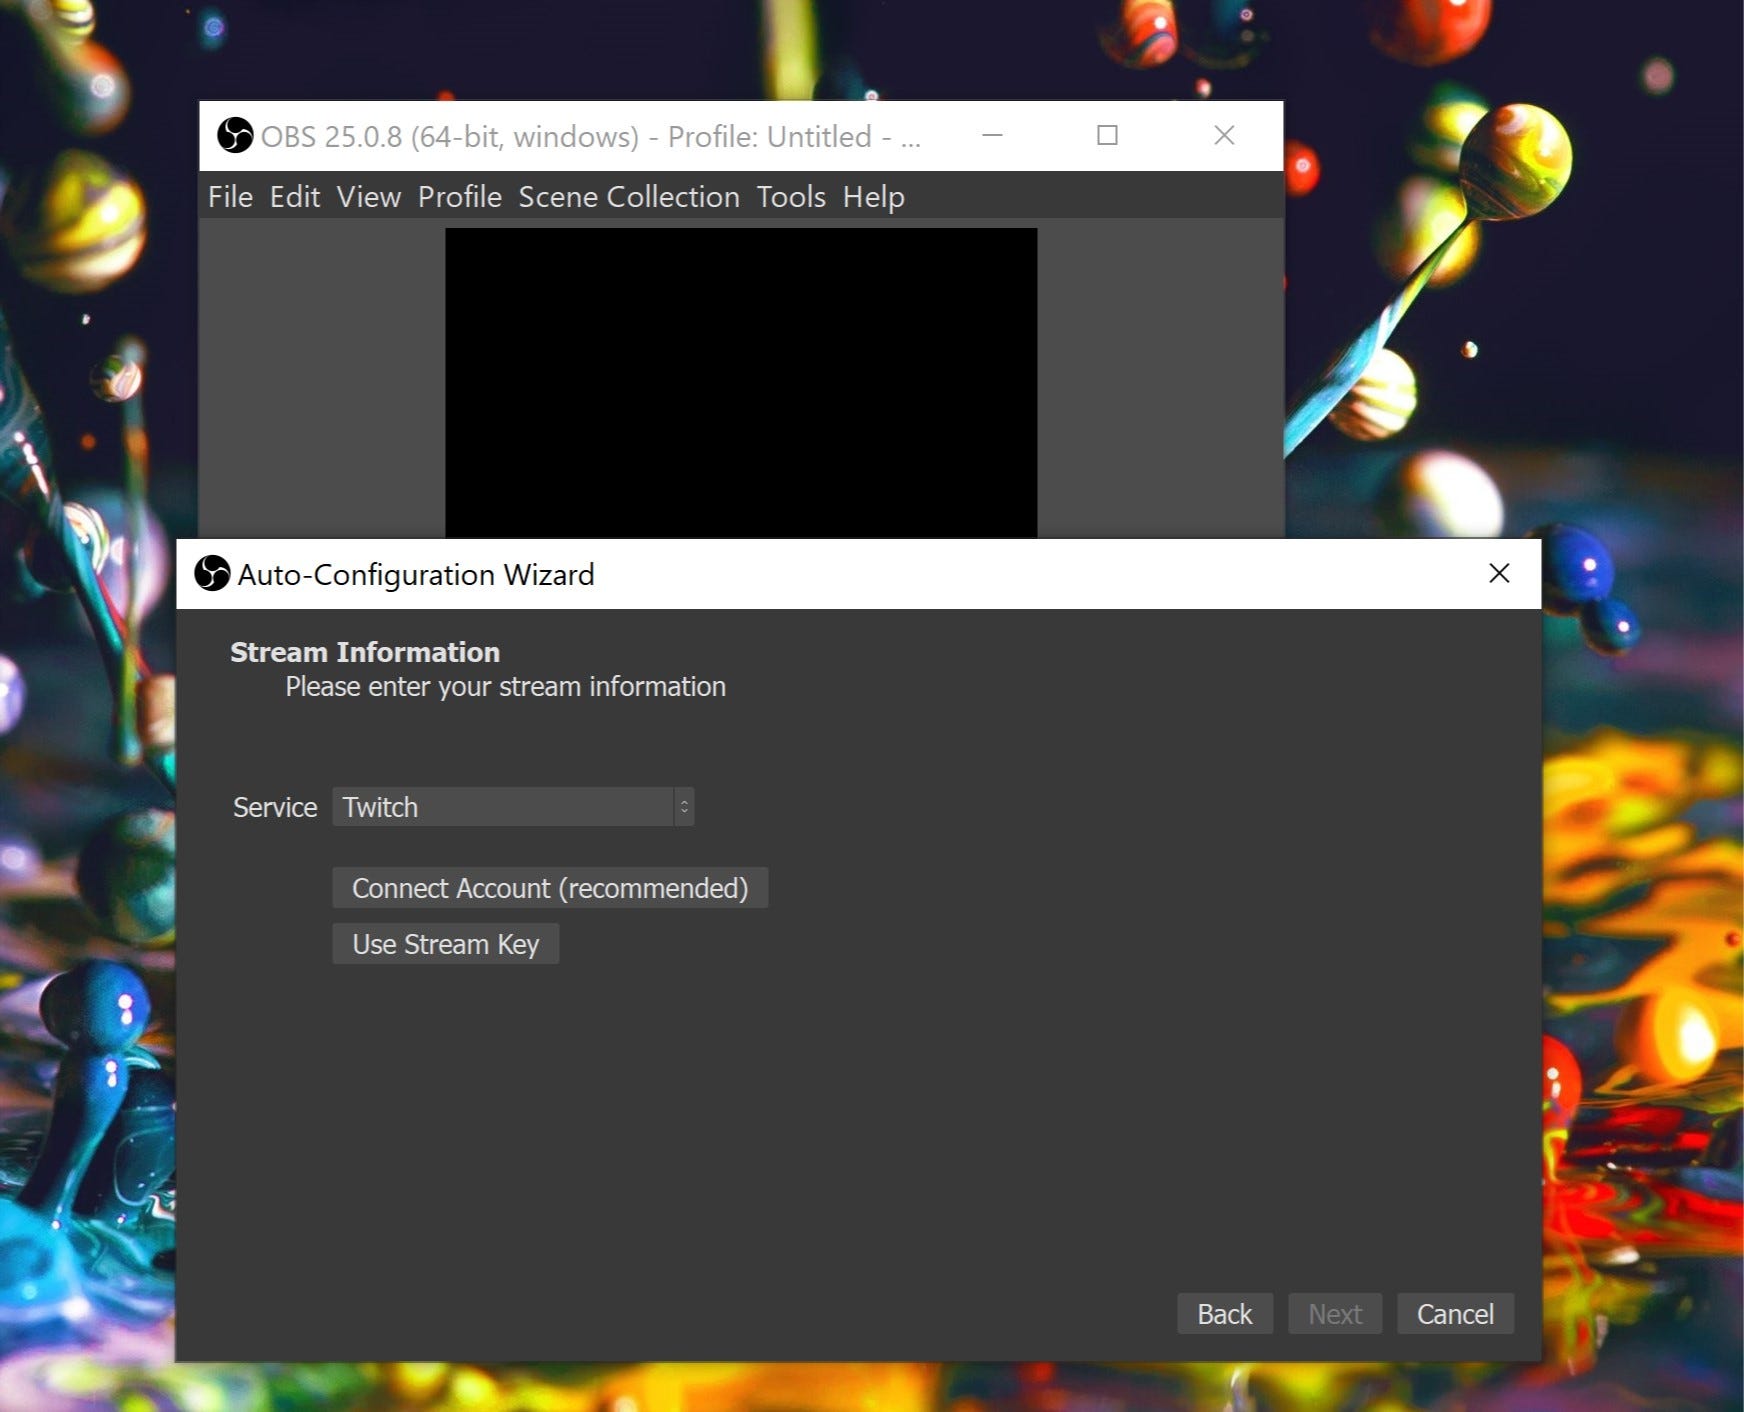
Now change the Service to ‘YouTube’ and click ‘Next’.
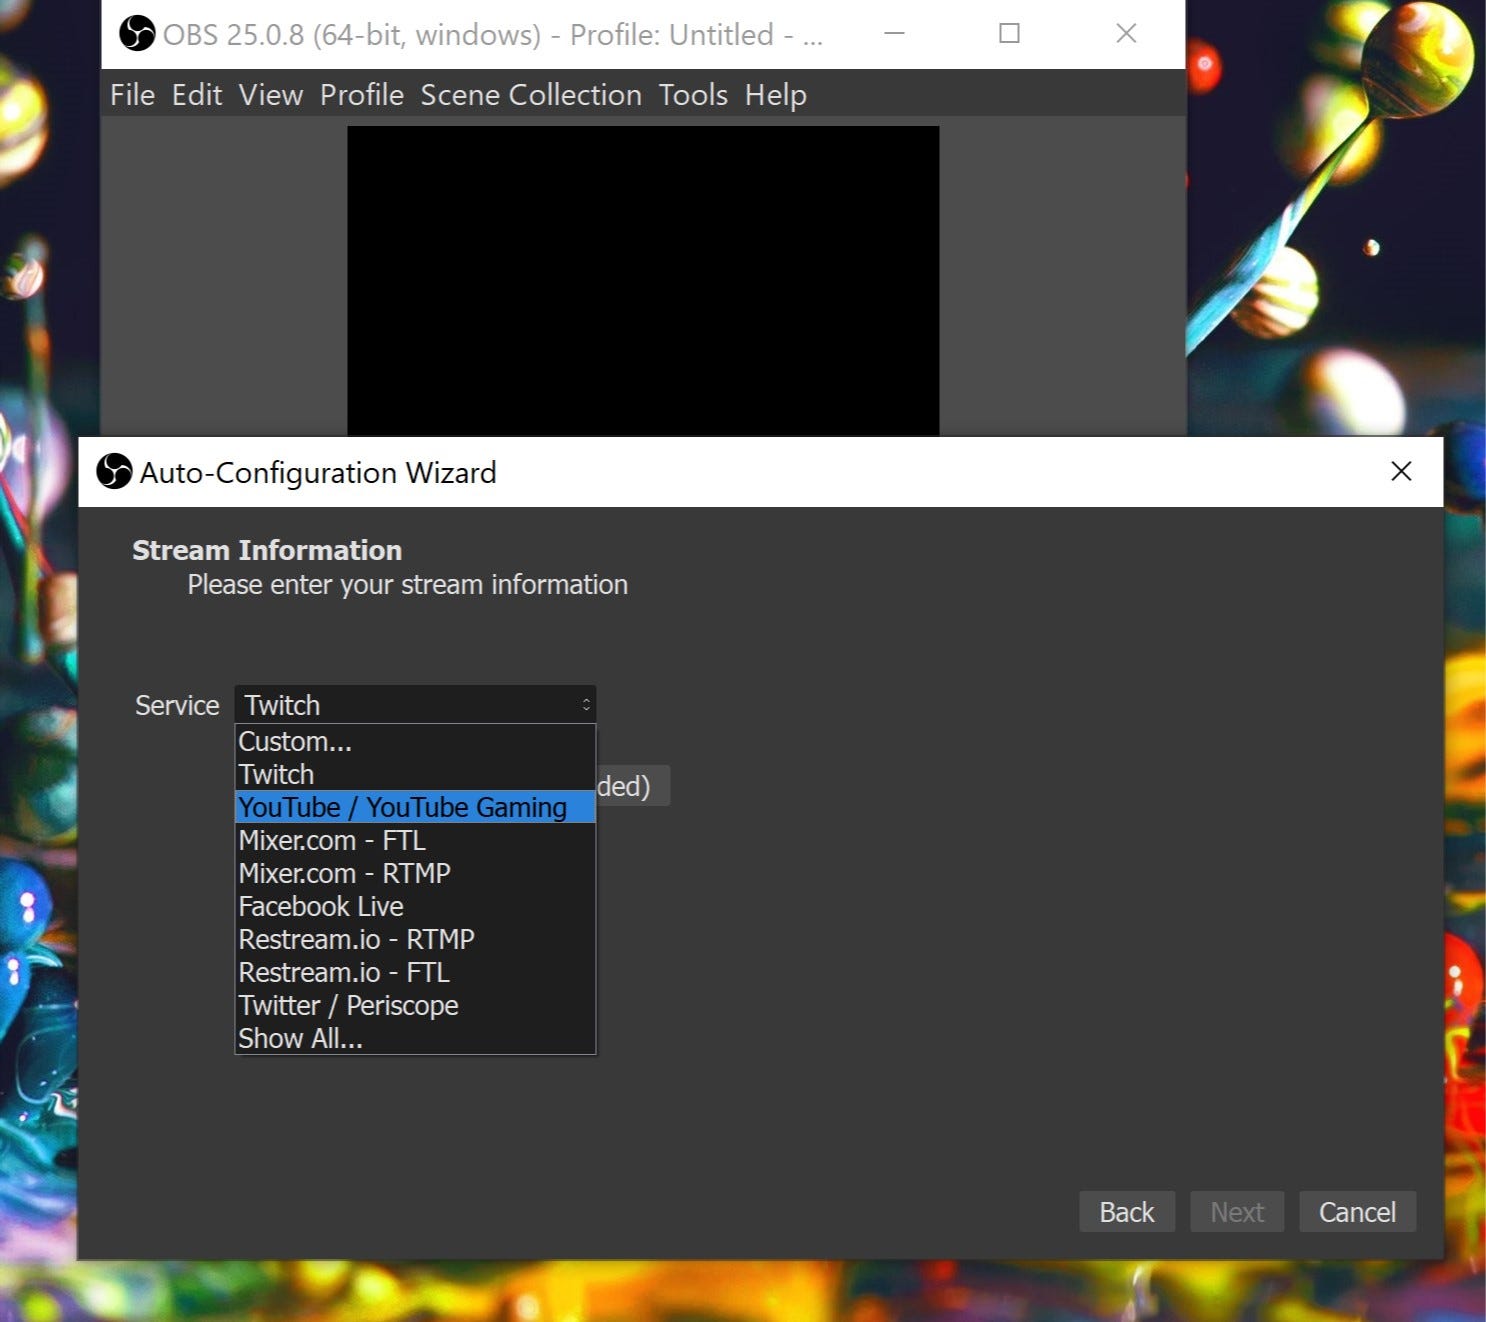
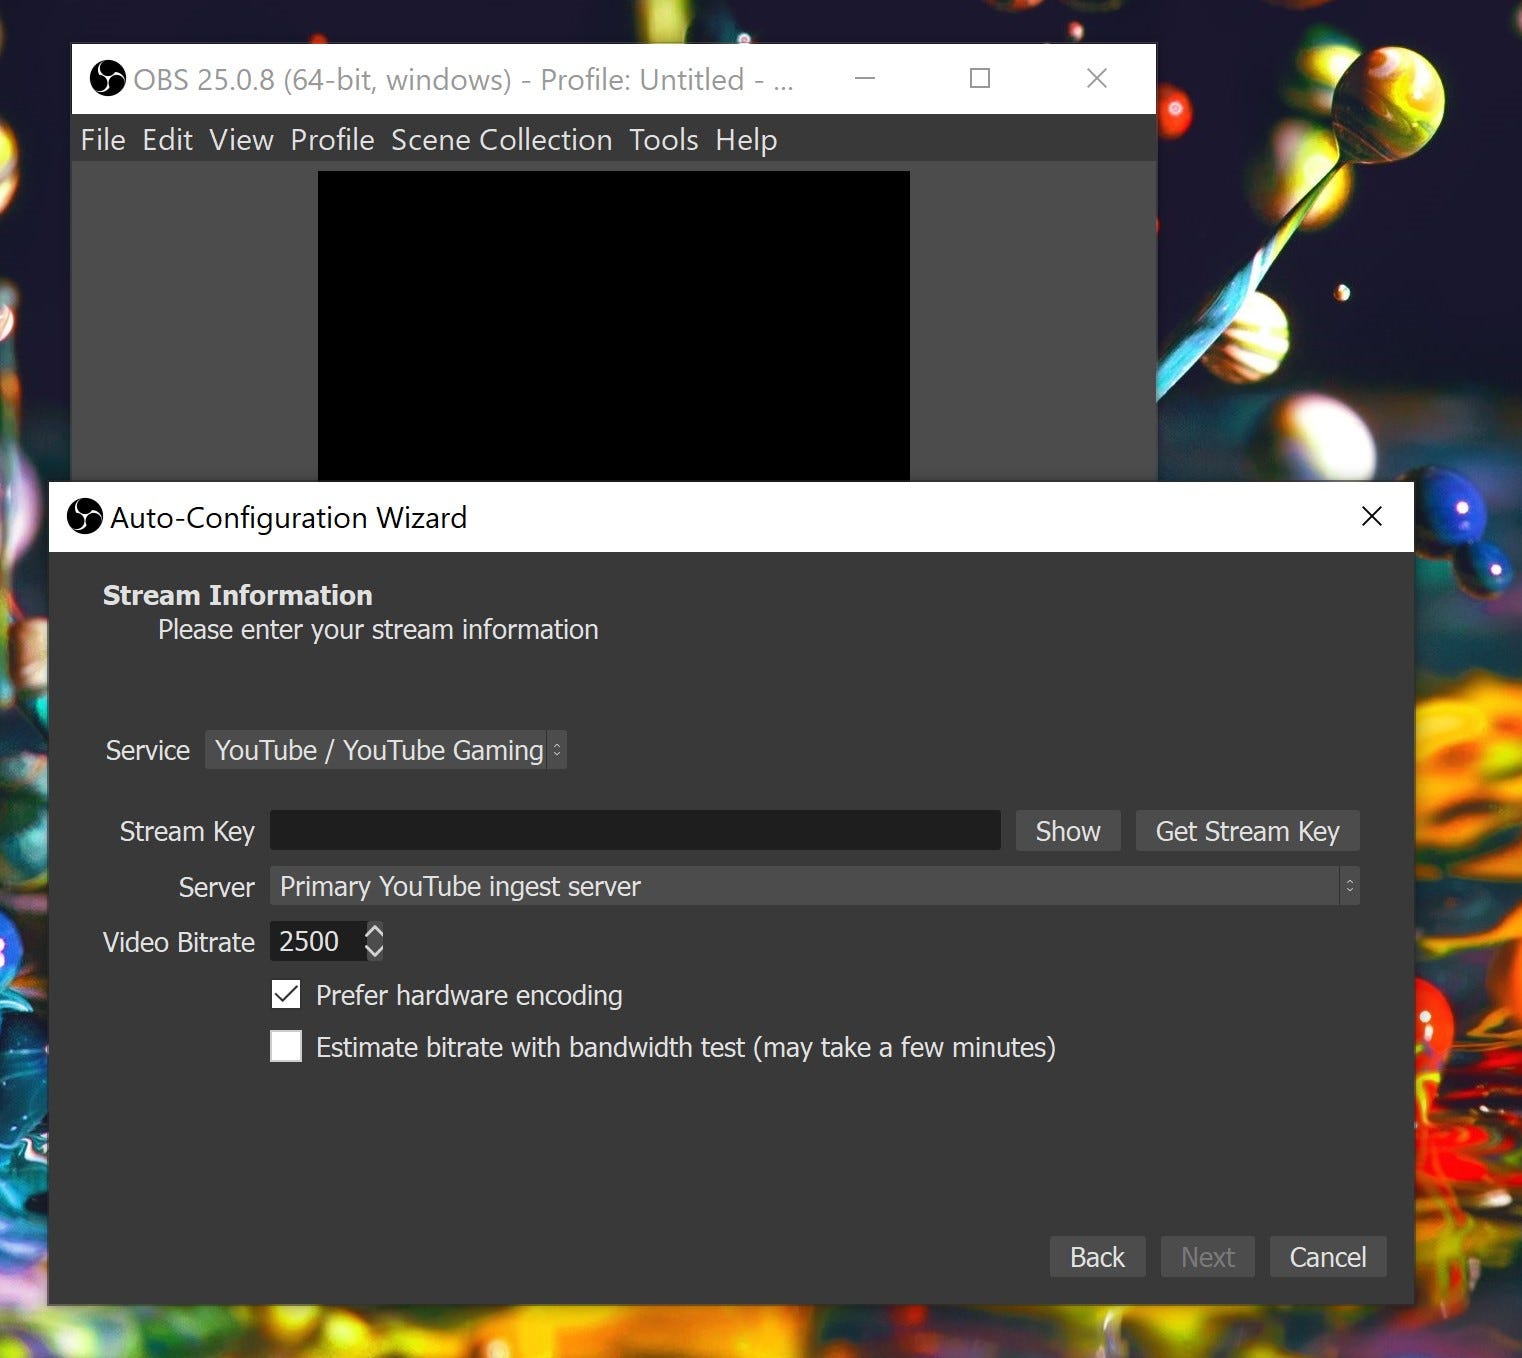
Step 6: You will have something like this now and now you should click on the ‘Get Stream Key’ option. It will take you to your own YouTube Studio Home Page where the stream key will be available.
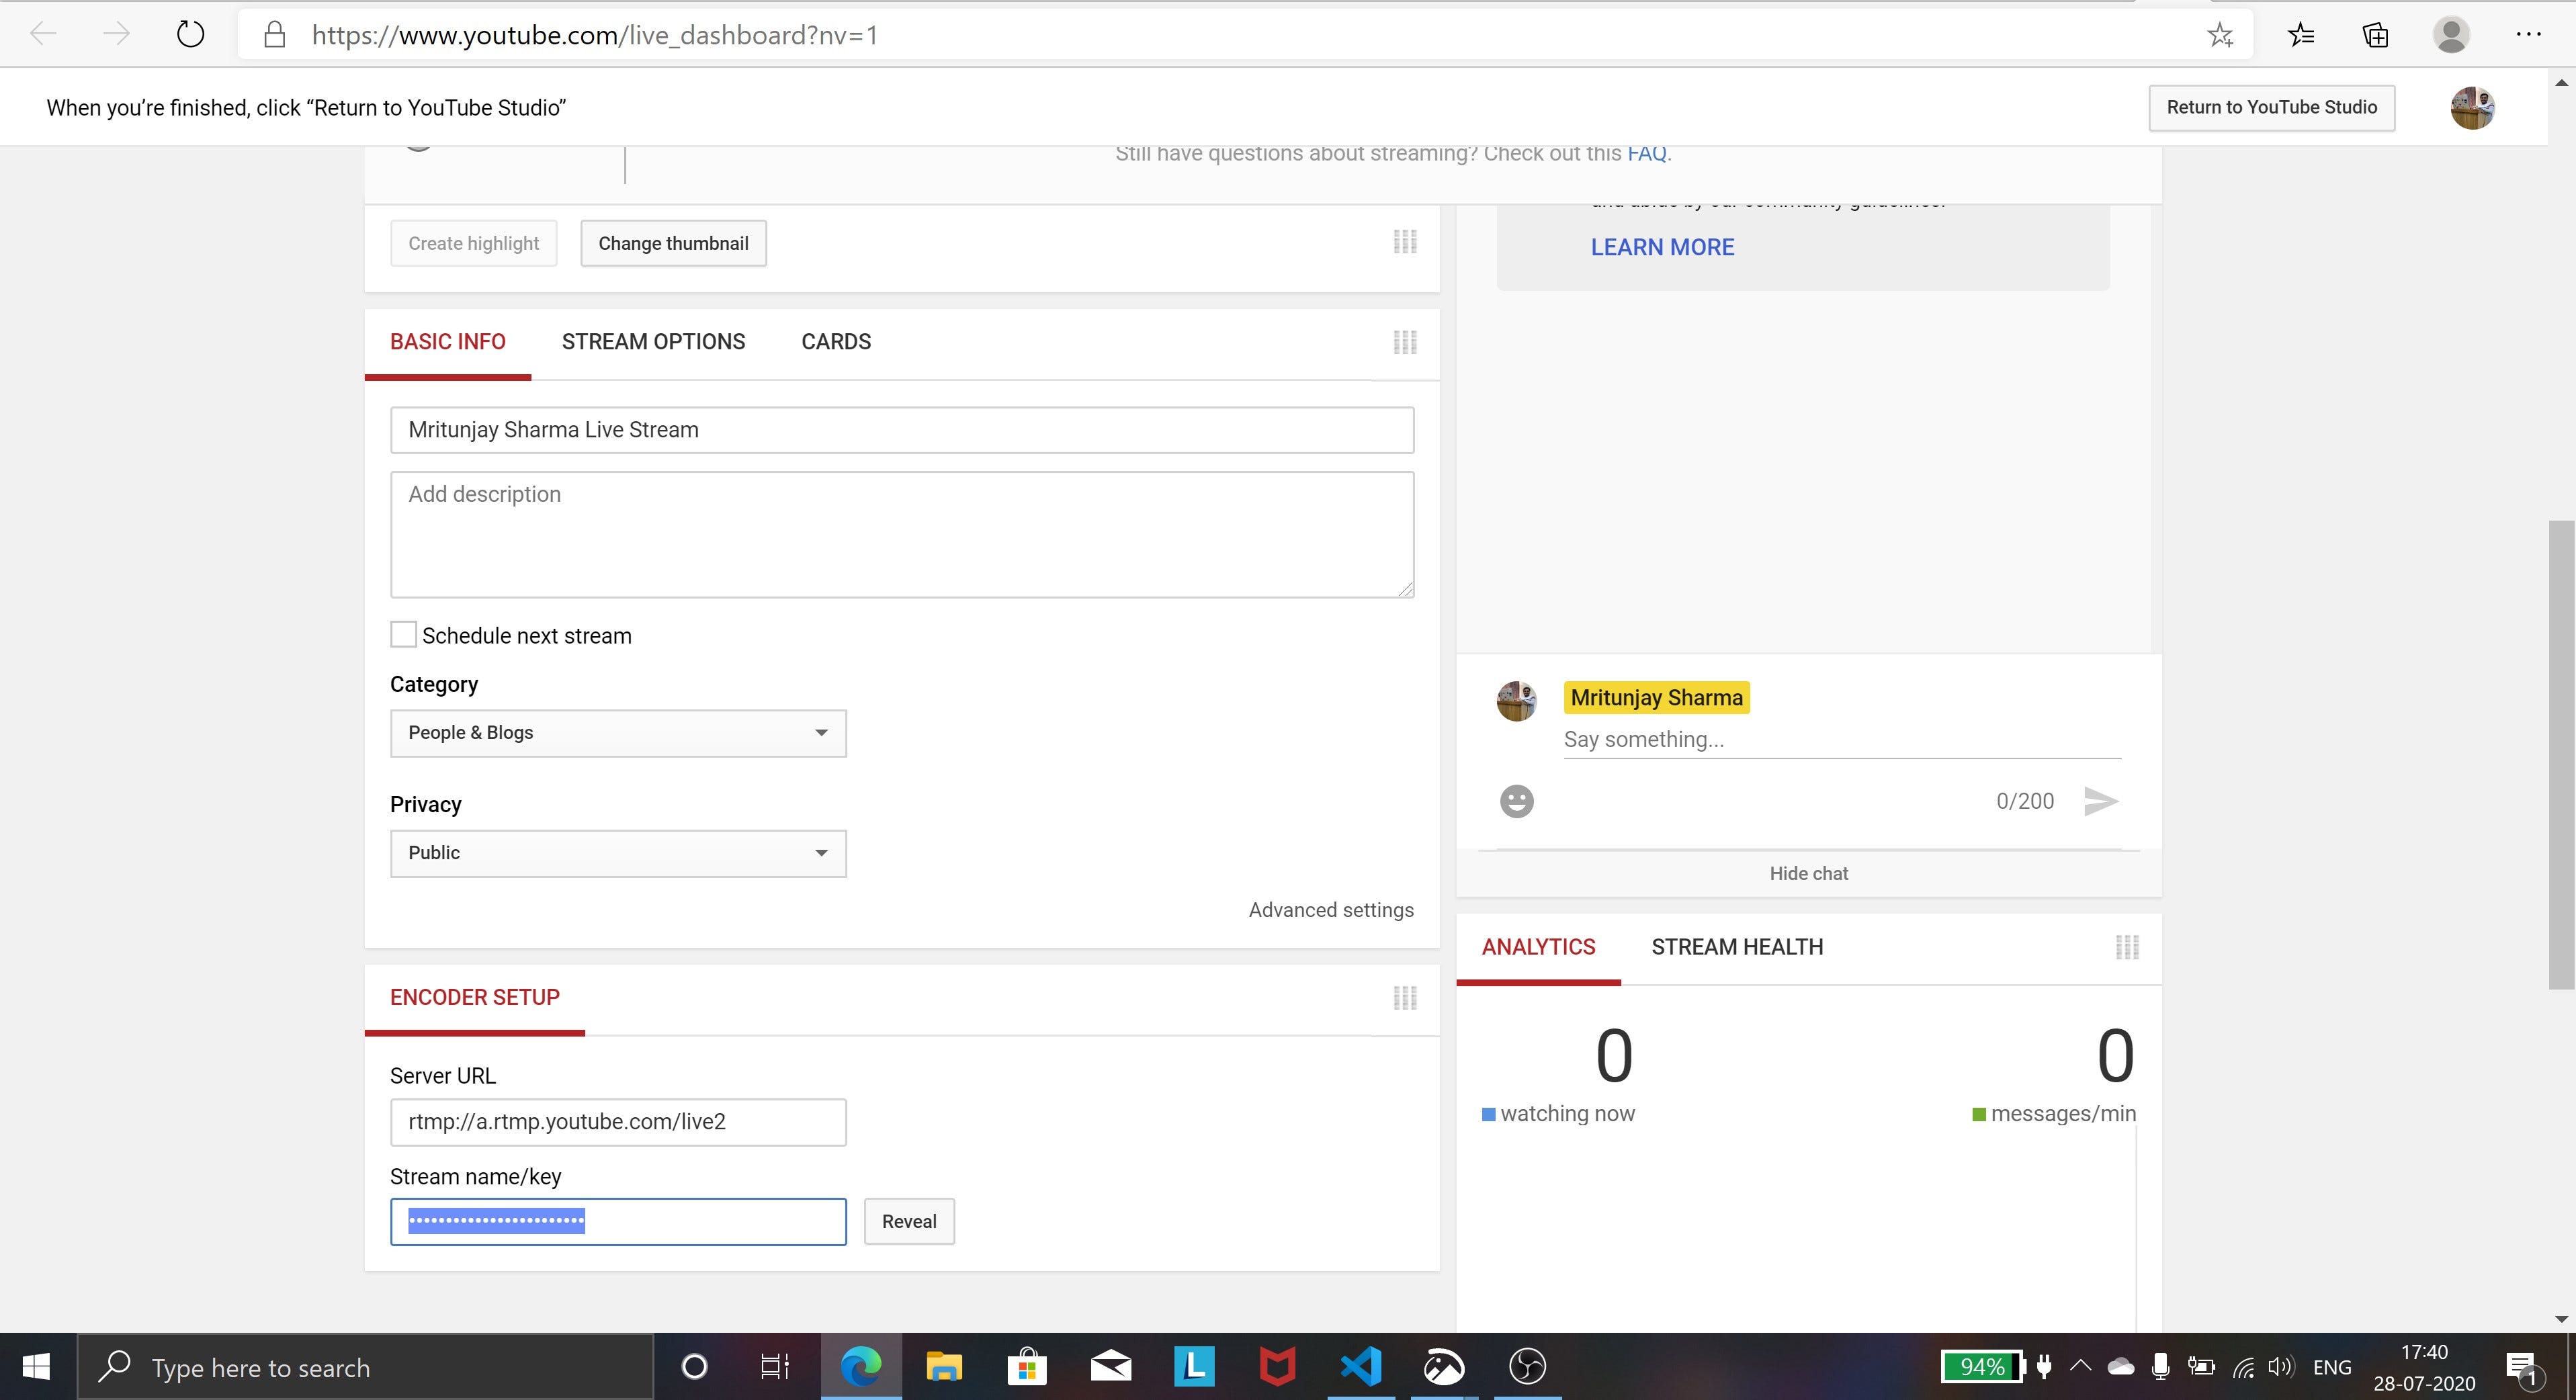
Step 7: Reveal and Copy the Stream Key. Paste it on the window above and click ‘Next’.
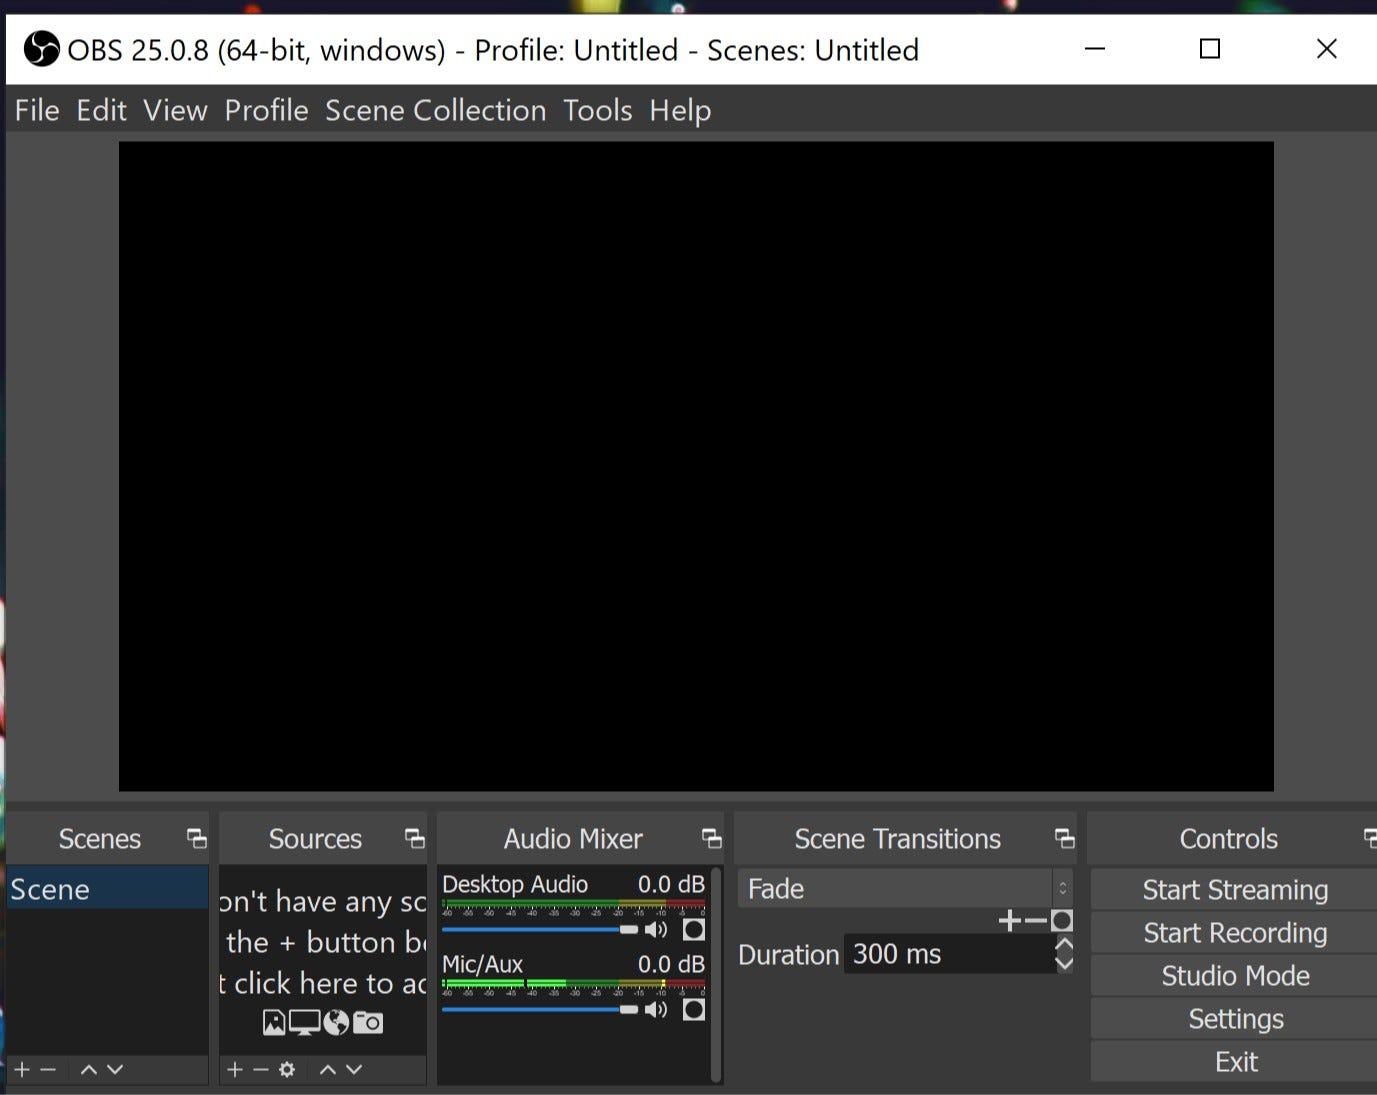
Step 8: Apply the settings and here it is — OBS Studio installed on your machine.🏁
I will also recommend you to enable the Studio Mode which will help you with Transitions and Streaming.
Live Streaming to YouTube
Now that we have installed OBS, let’s move on to Live Streaming something on YouTube.
For this Tutorial, I will do a “Windows Capture” of VS Code and stream it live on YouTube. It totally depends on you on what you will like to prefer.
So, let’s begin!
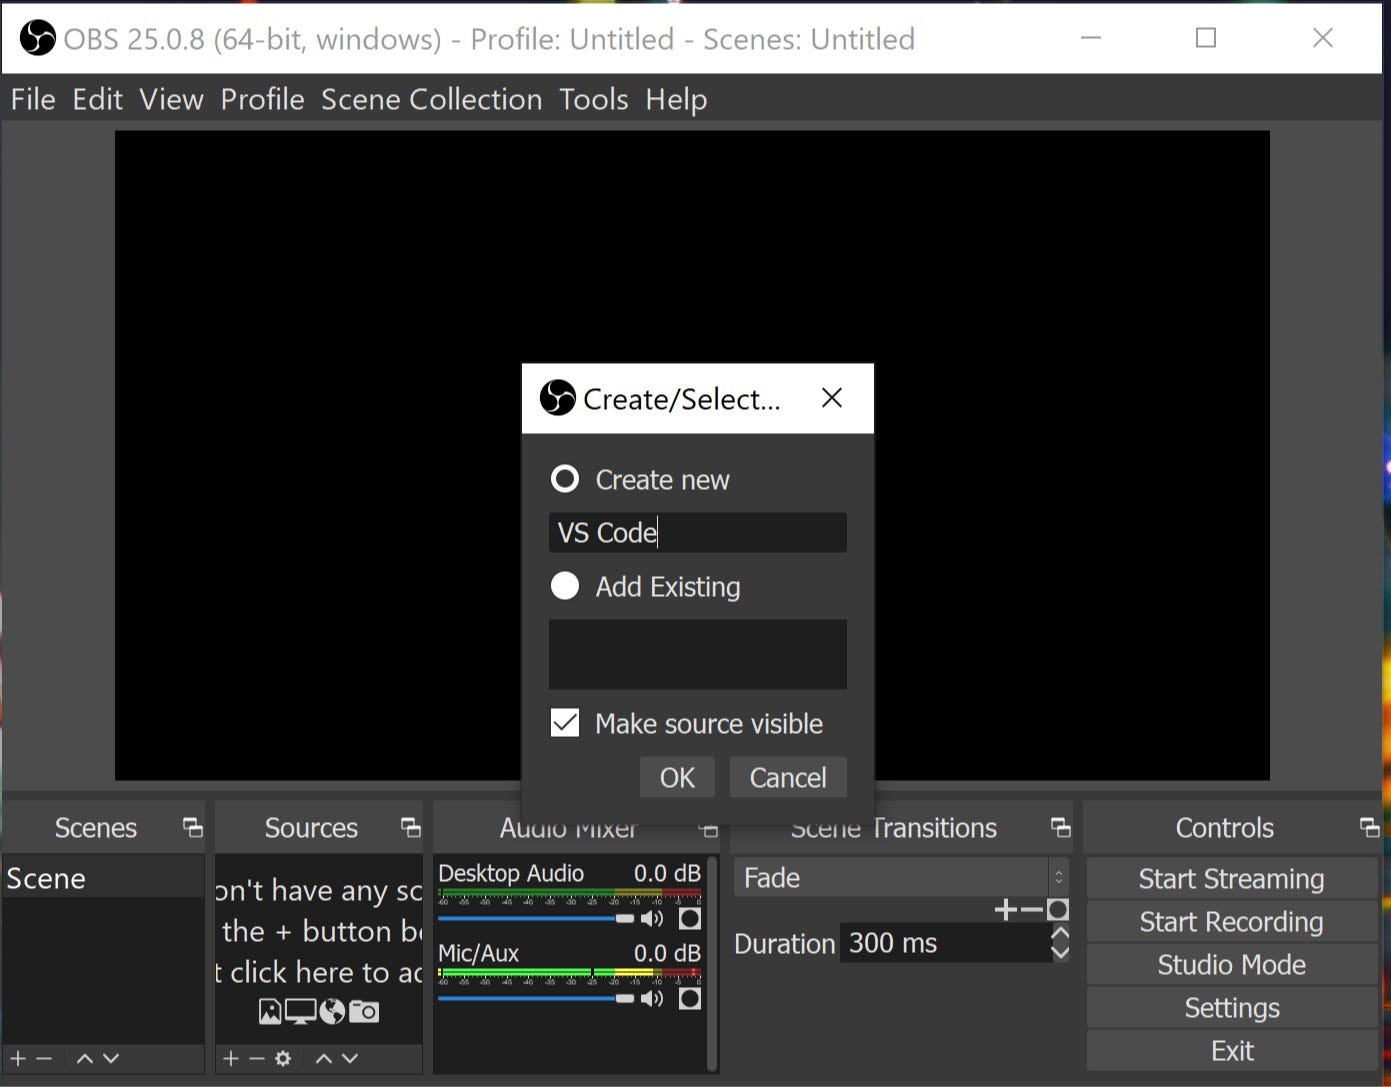
Step 1: Can you see that ‘+’ button in ‘Sources’ section? Yes, click it and select “Windows Capture” option. After which you will have screen something like this. I have made the name of the Source as ‘VS Code’ and you can of course choose a name of your liking.
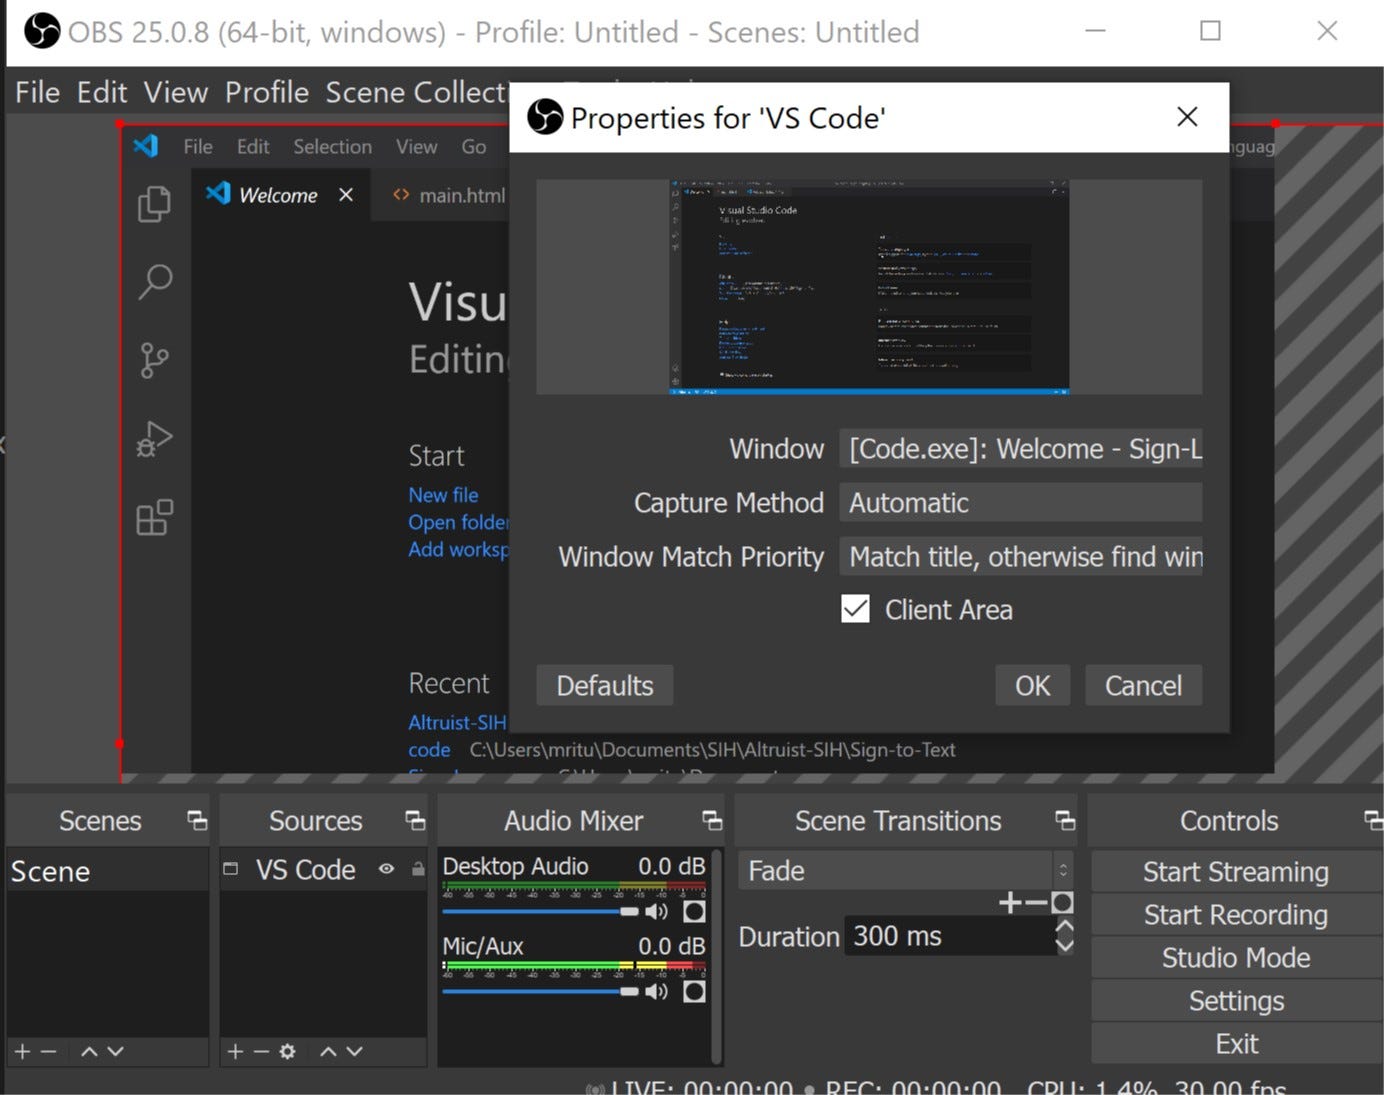
On Clicking ‘OK’, you will have to select the ‘Window’ you want to capture. In my case, I selected VS Code. Click ‘OK’ and proceed.
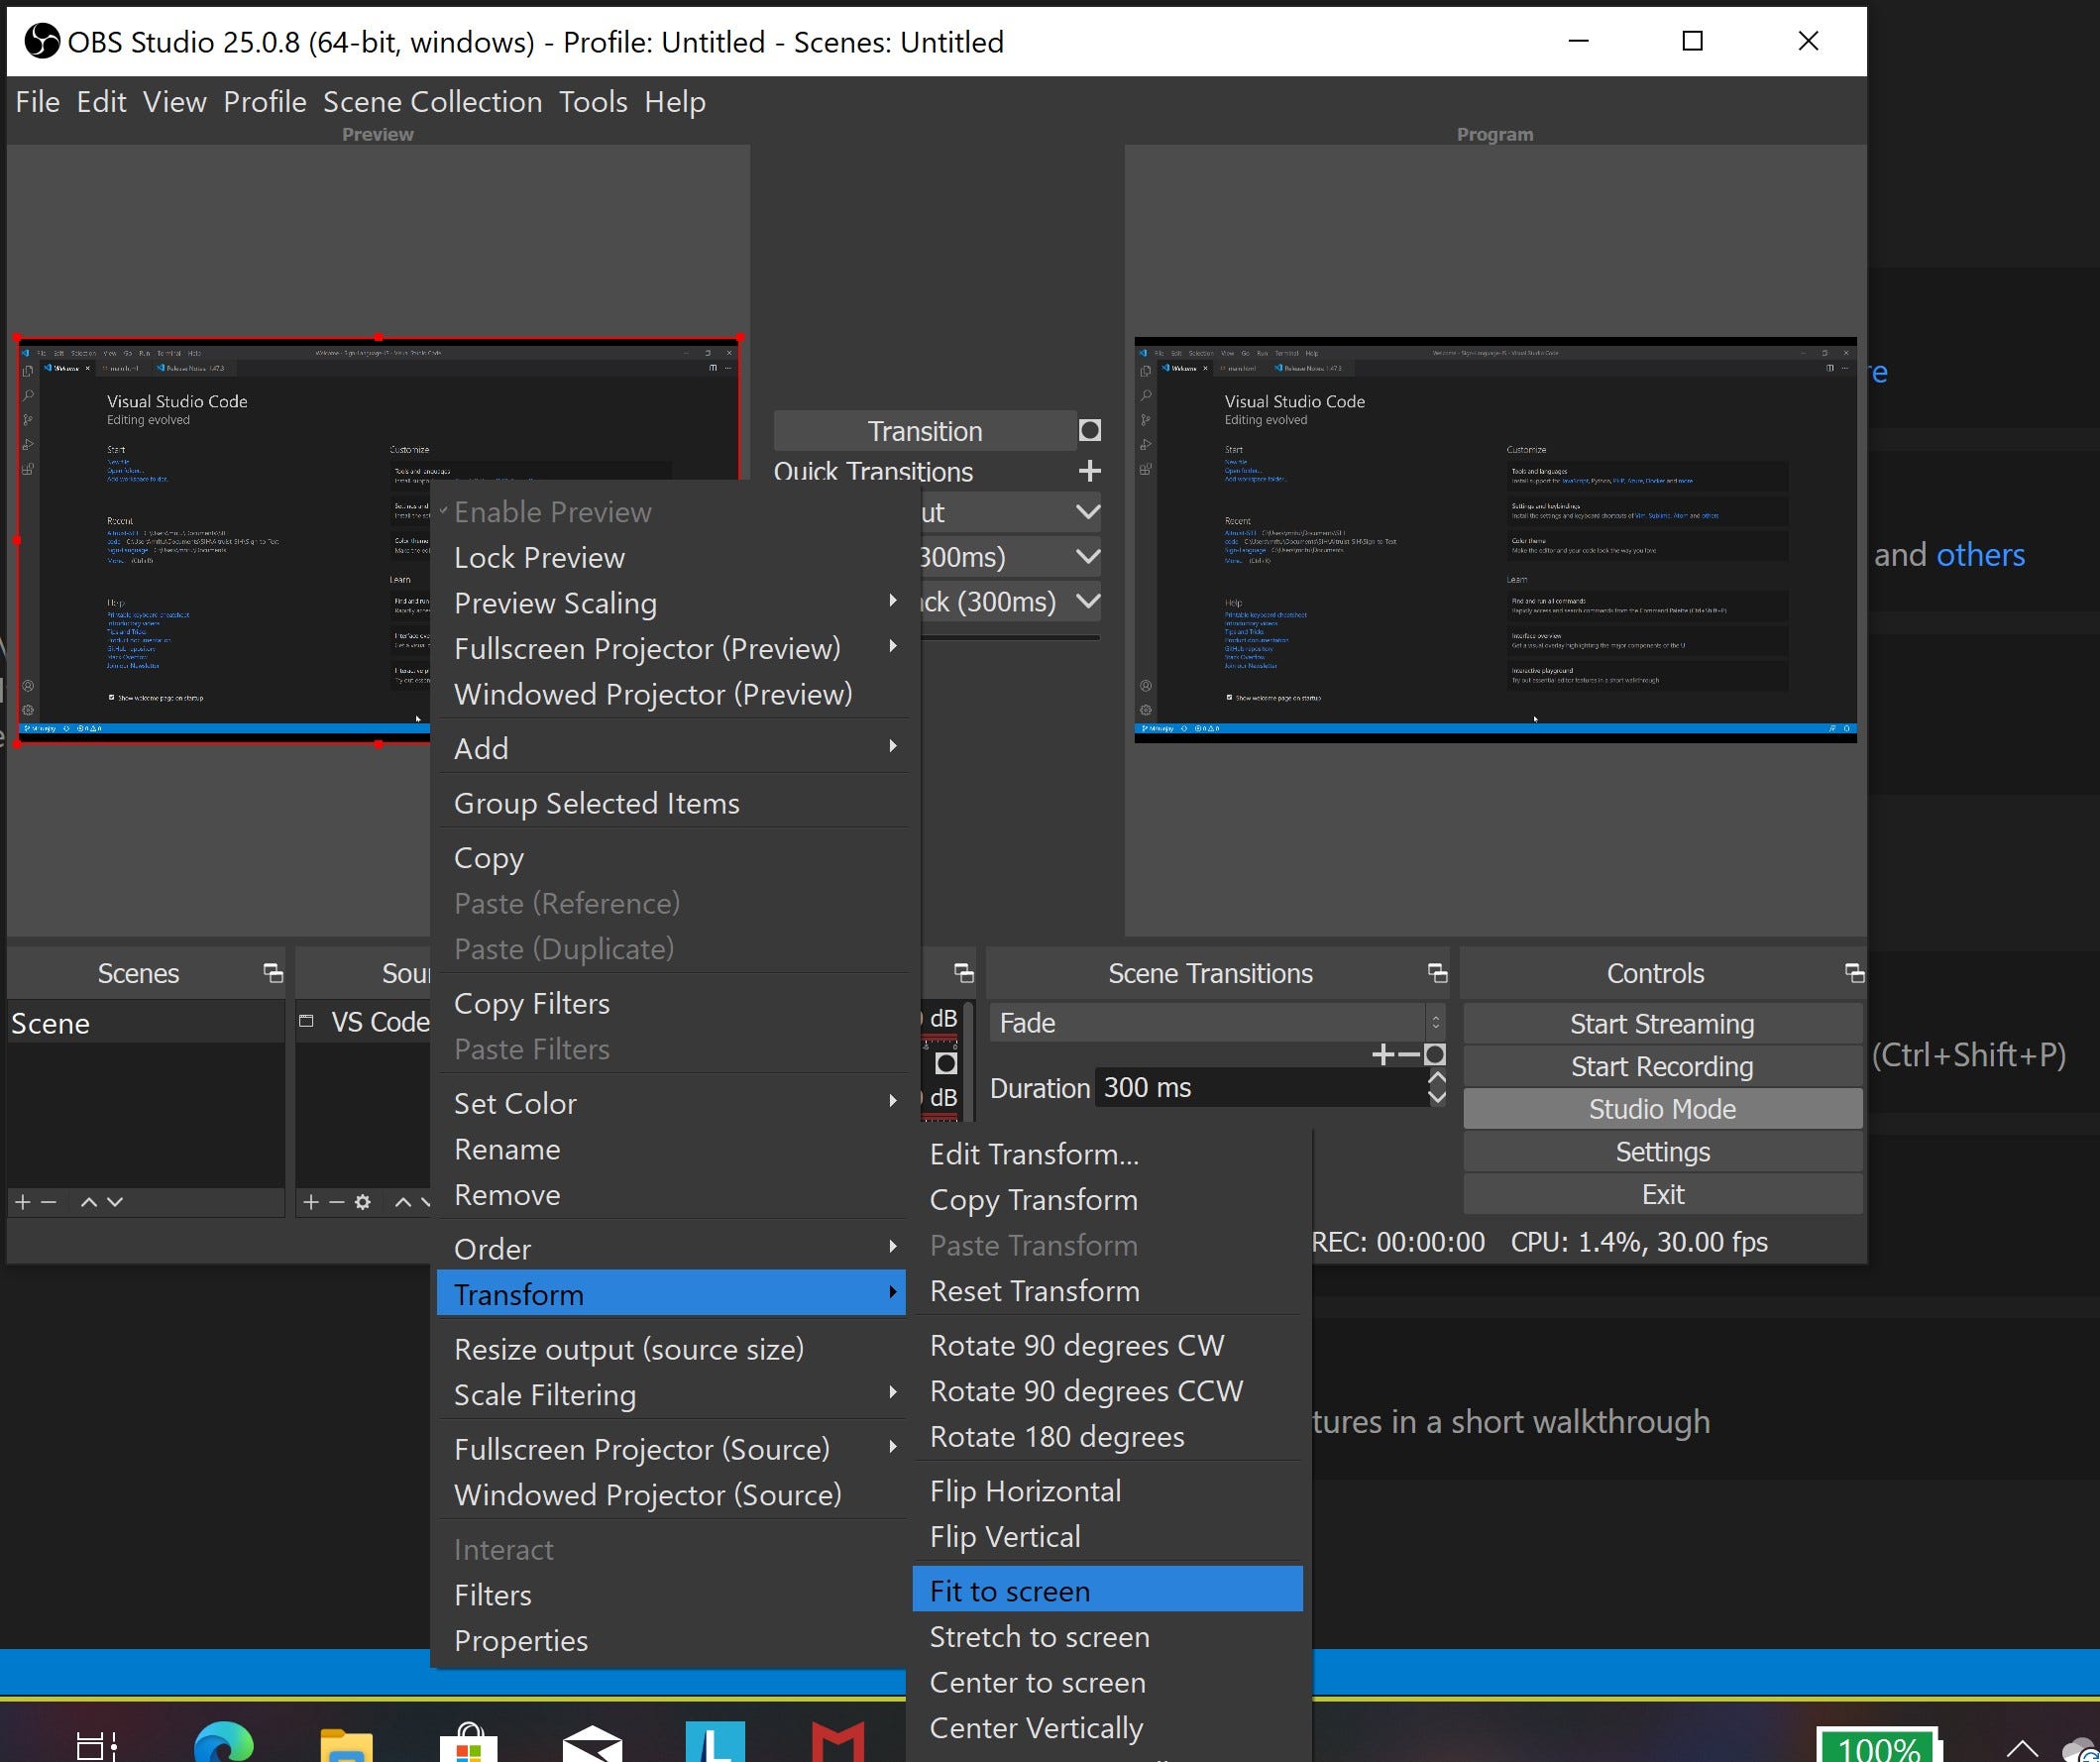
Step 2: You can modify the window as per your requirement, I preferred here to use “Fit to Screen” (Right click on the window area inside OBS and you will have the option visible).
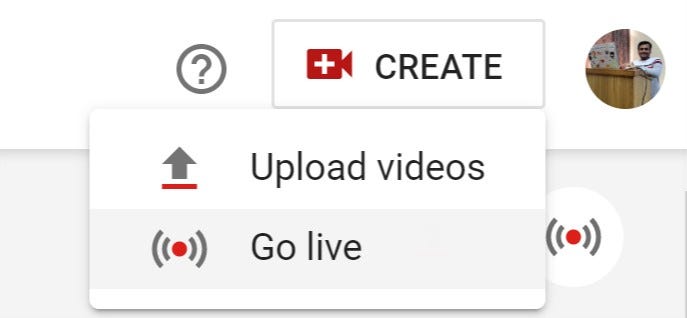
Step 3: Open your browser and go to your YouTube Page and click the ‘Go live’ option.
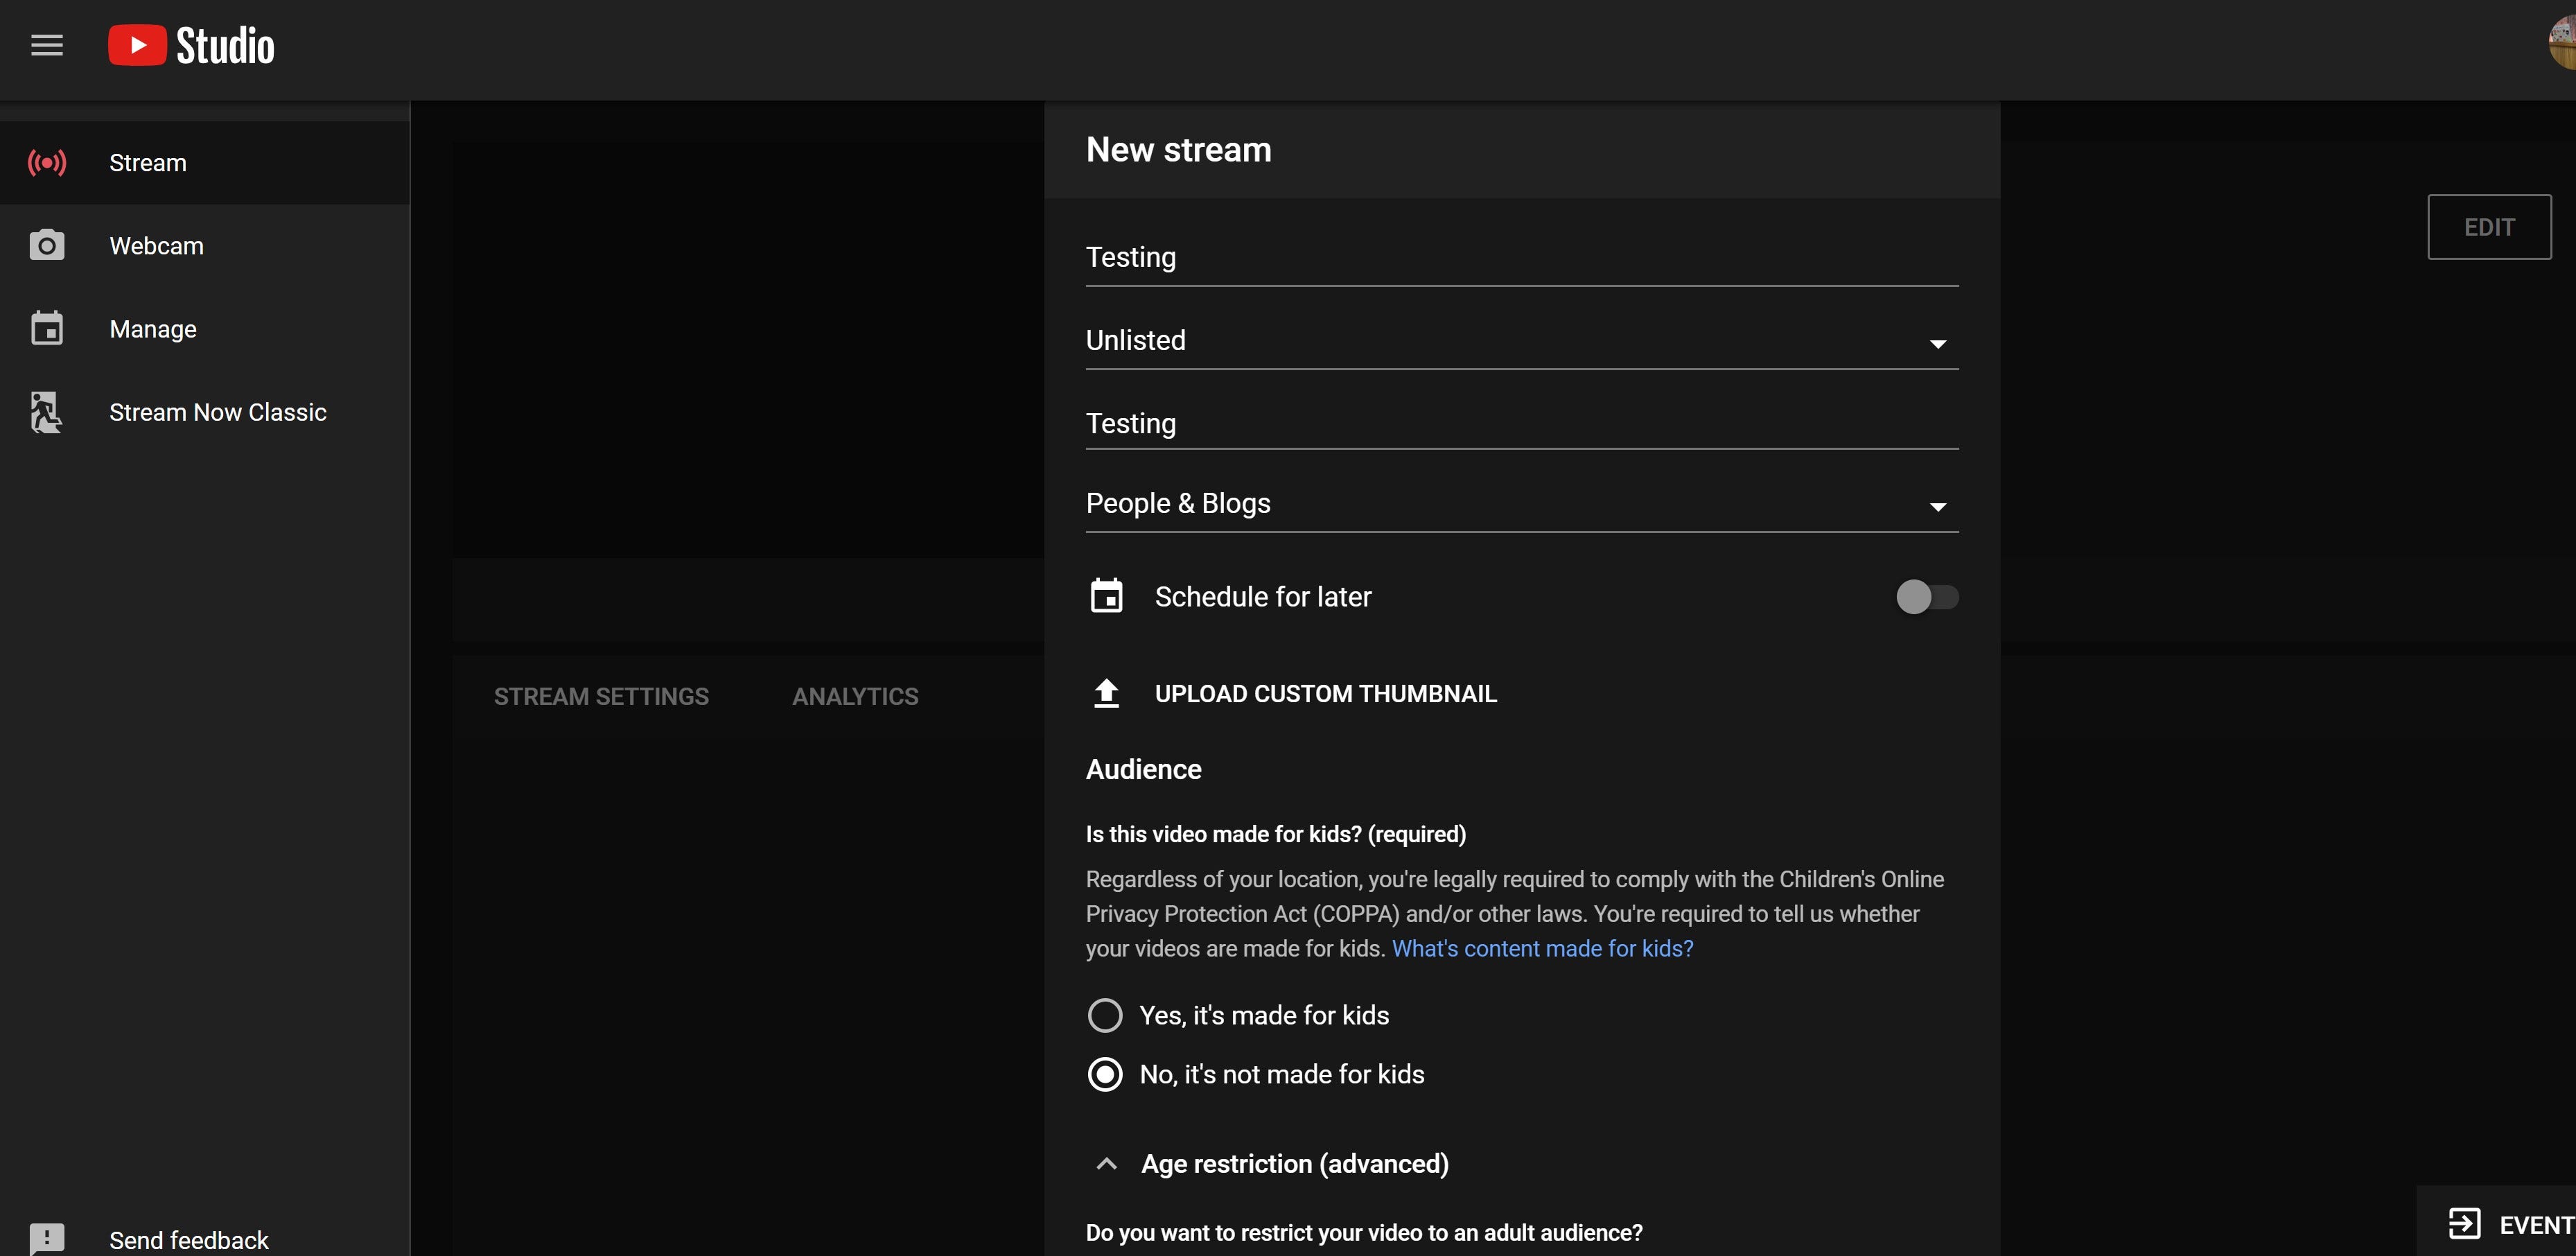
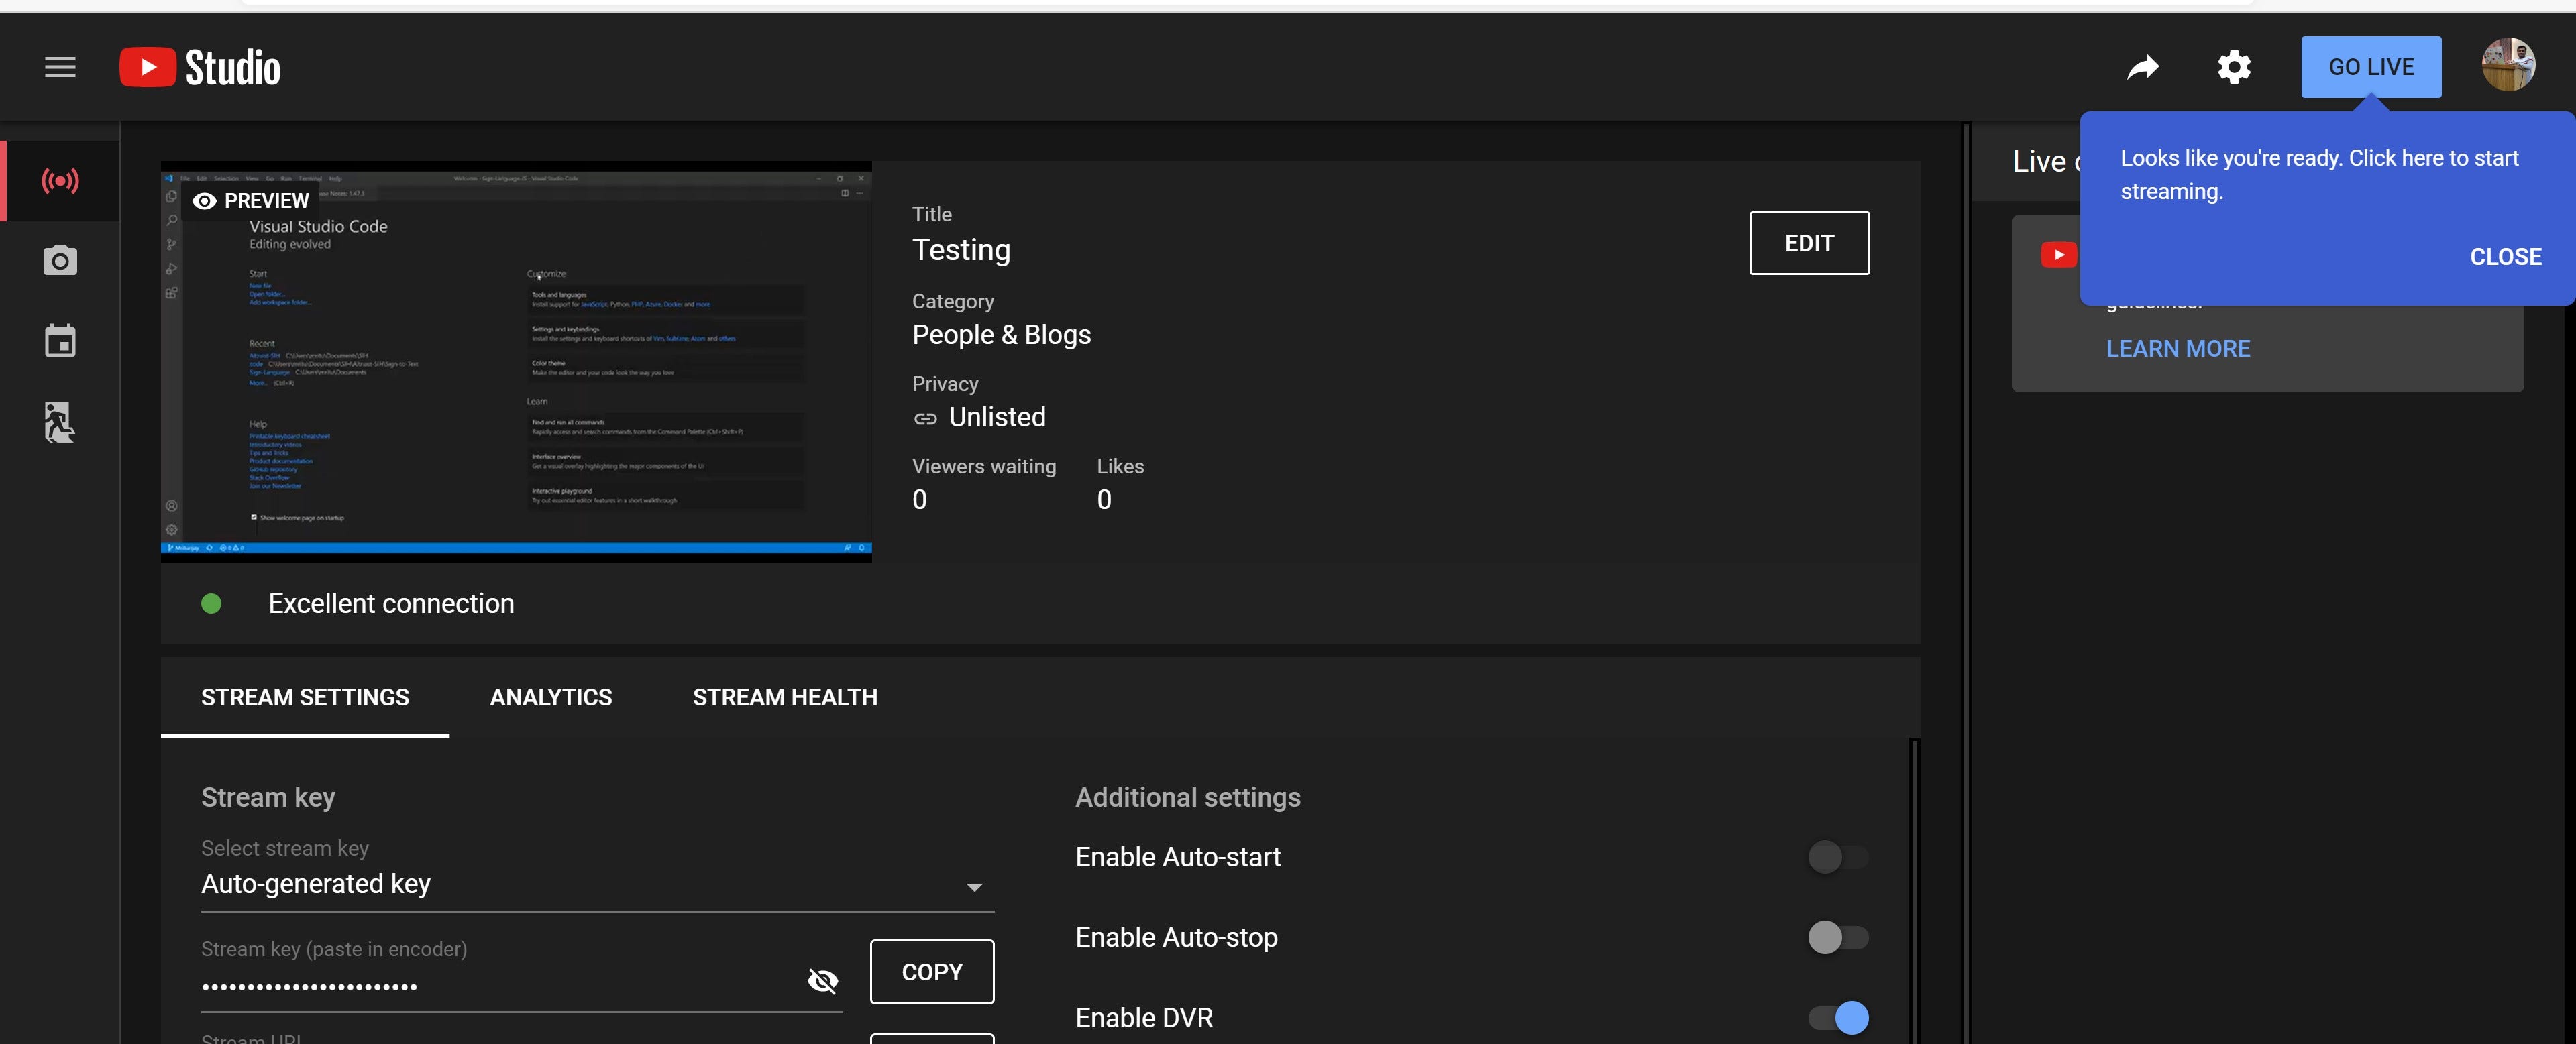
Step 4: You will be redirected to YouTube Studio Control Room and now have to configure the settings which are somewhat like this in my case. I have deliberately kept the video ‘Unlisted’ and you are always welcome to make it ‘Public’ if it’s meant for them . After this, click the “Create Stream” option that is there below these configure settings.
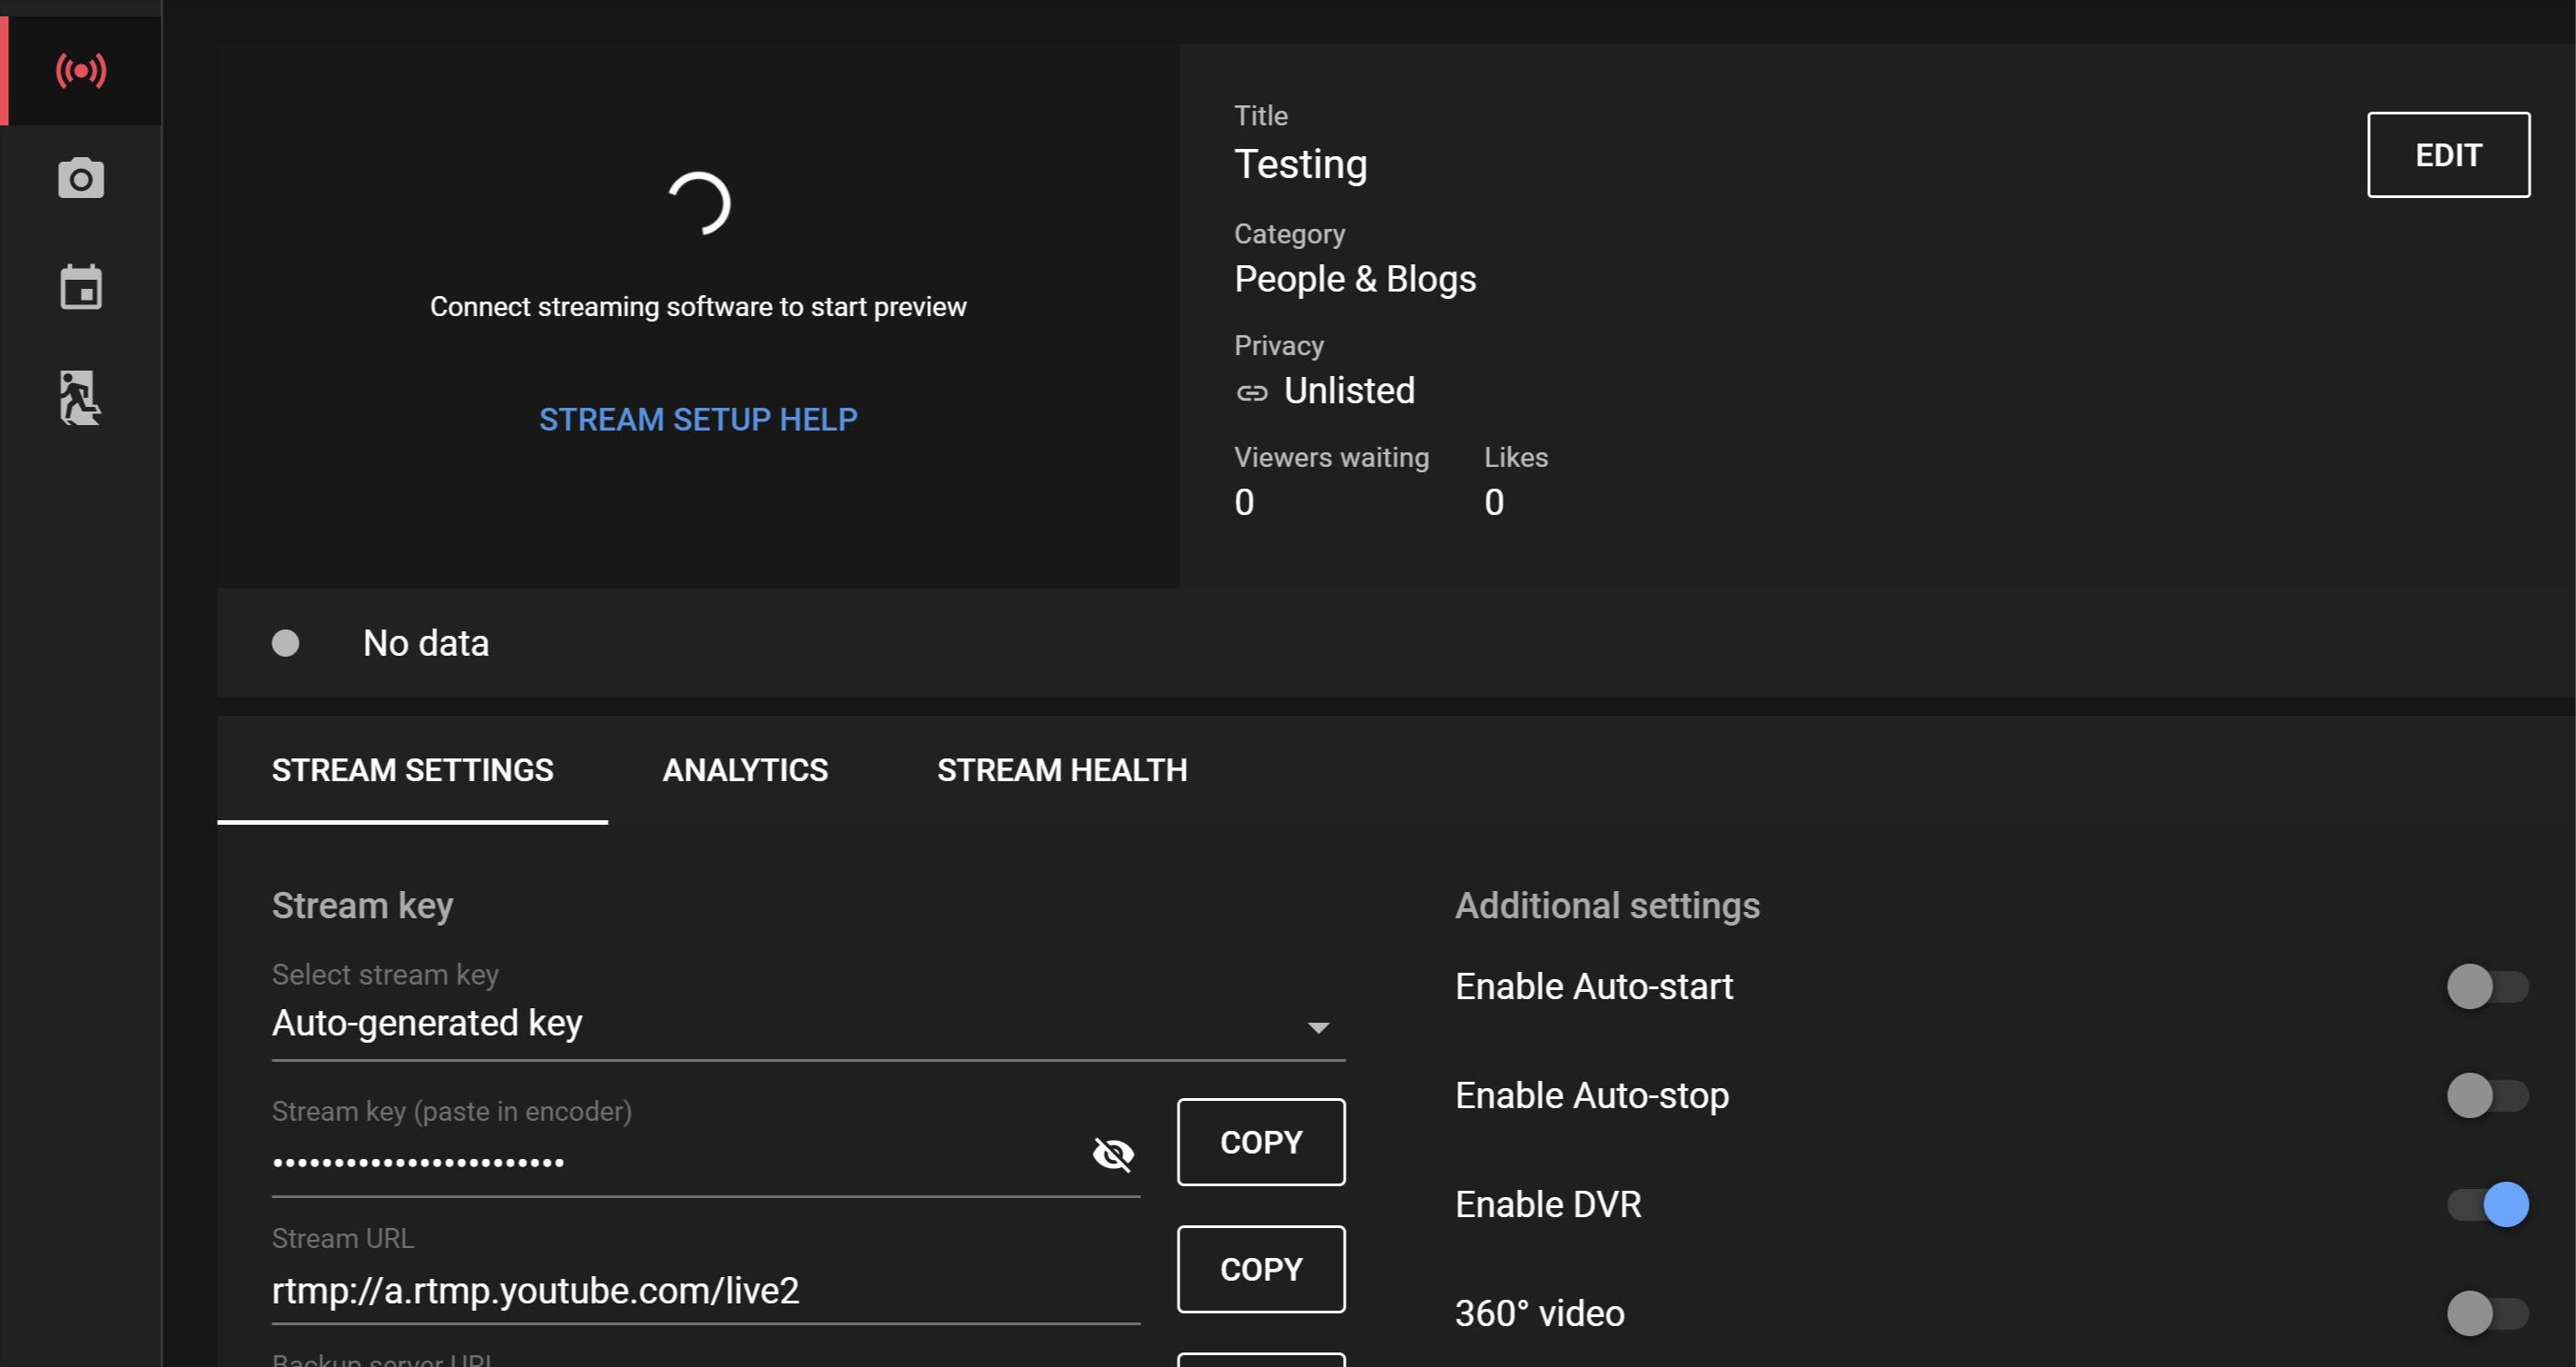
Step 5: Now Copy the “Stream Key” again.
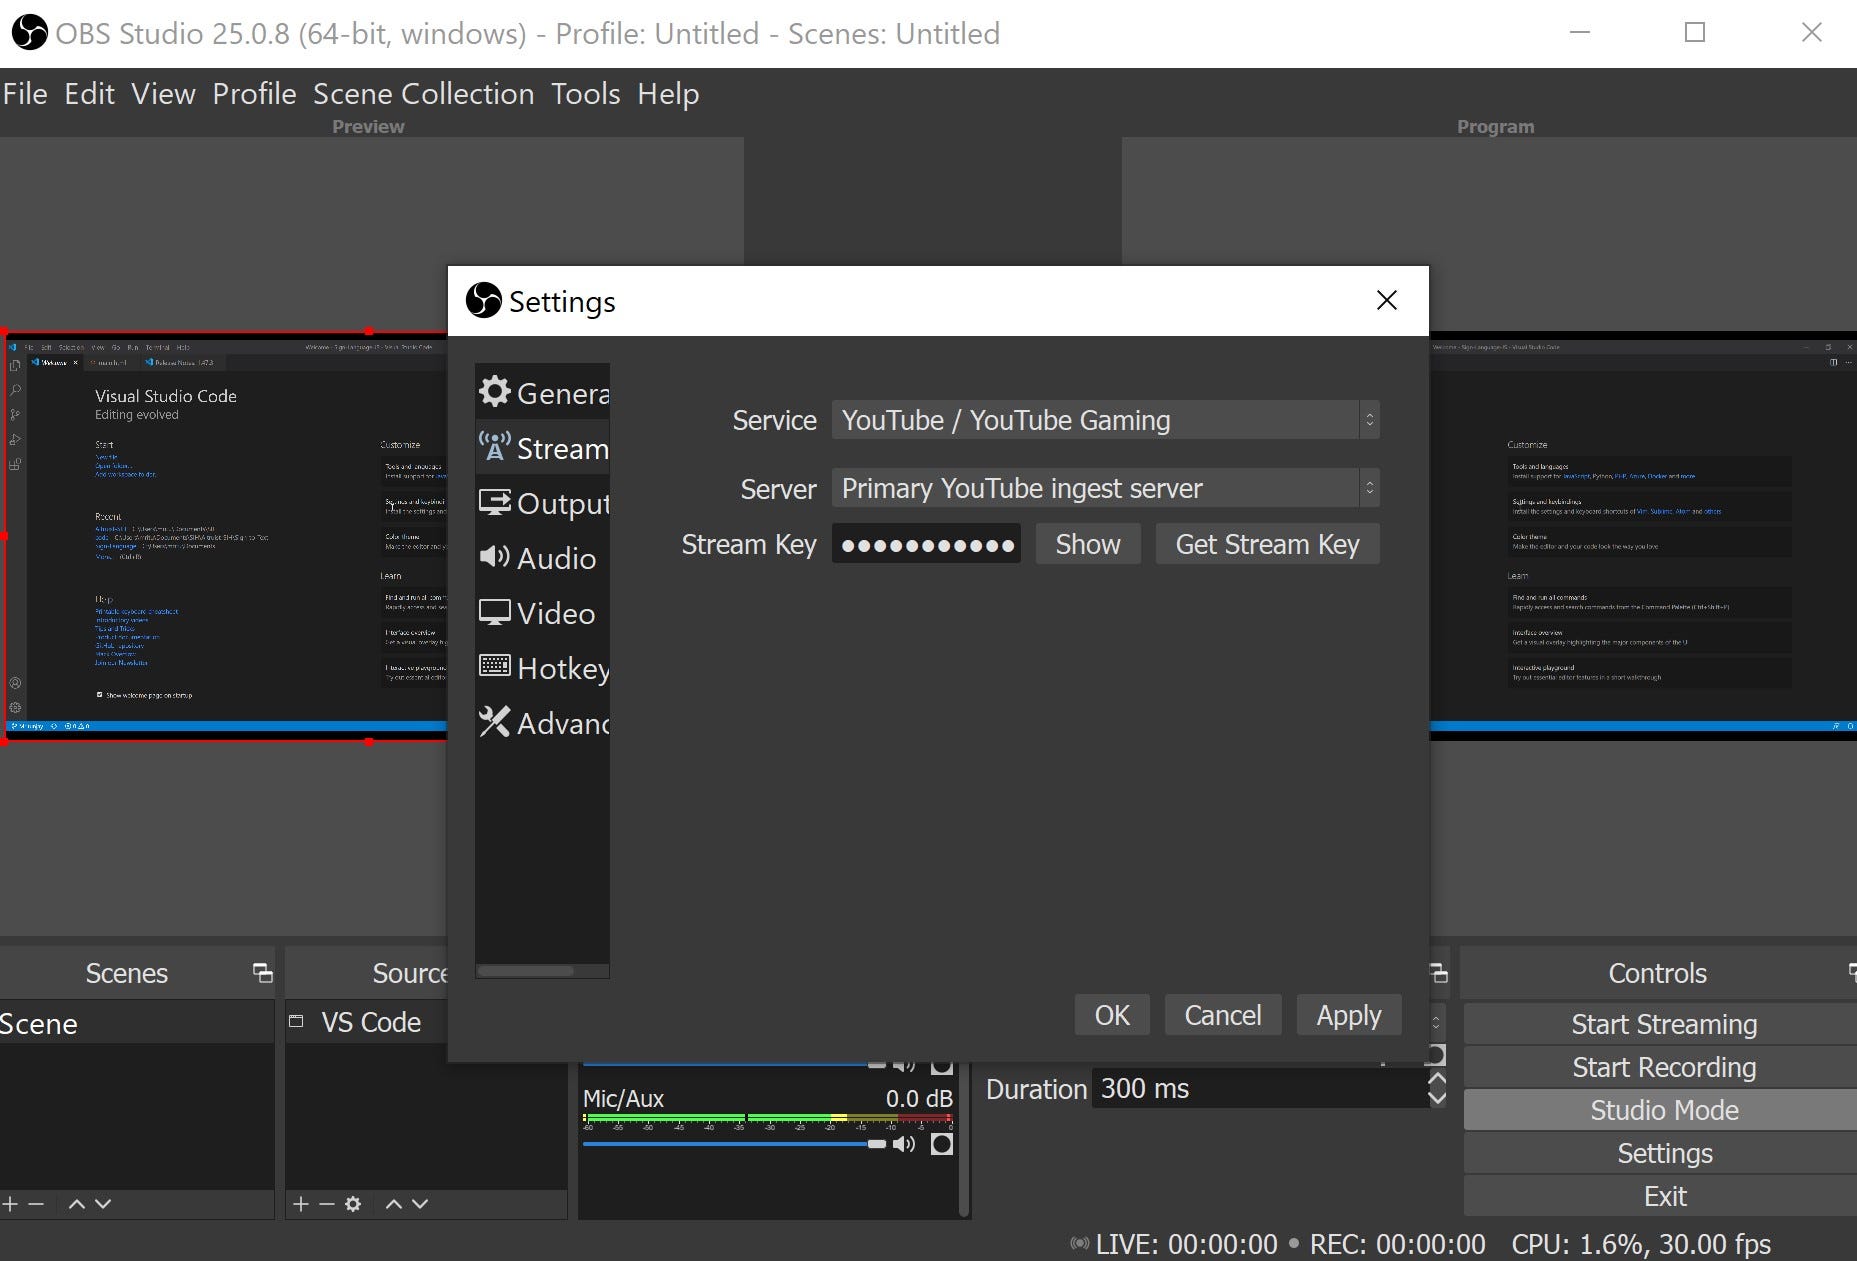
Step 6: Come back to OBS. Select the File->Settings option. Go to ‘Stream’ and paste the new “Stream Key”.
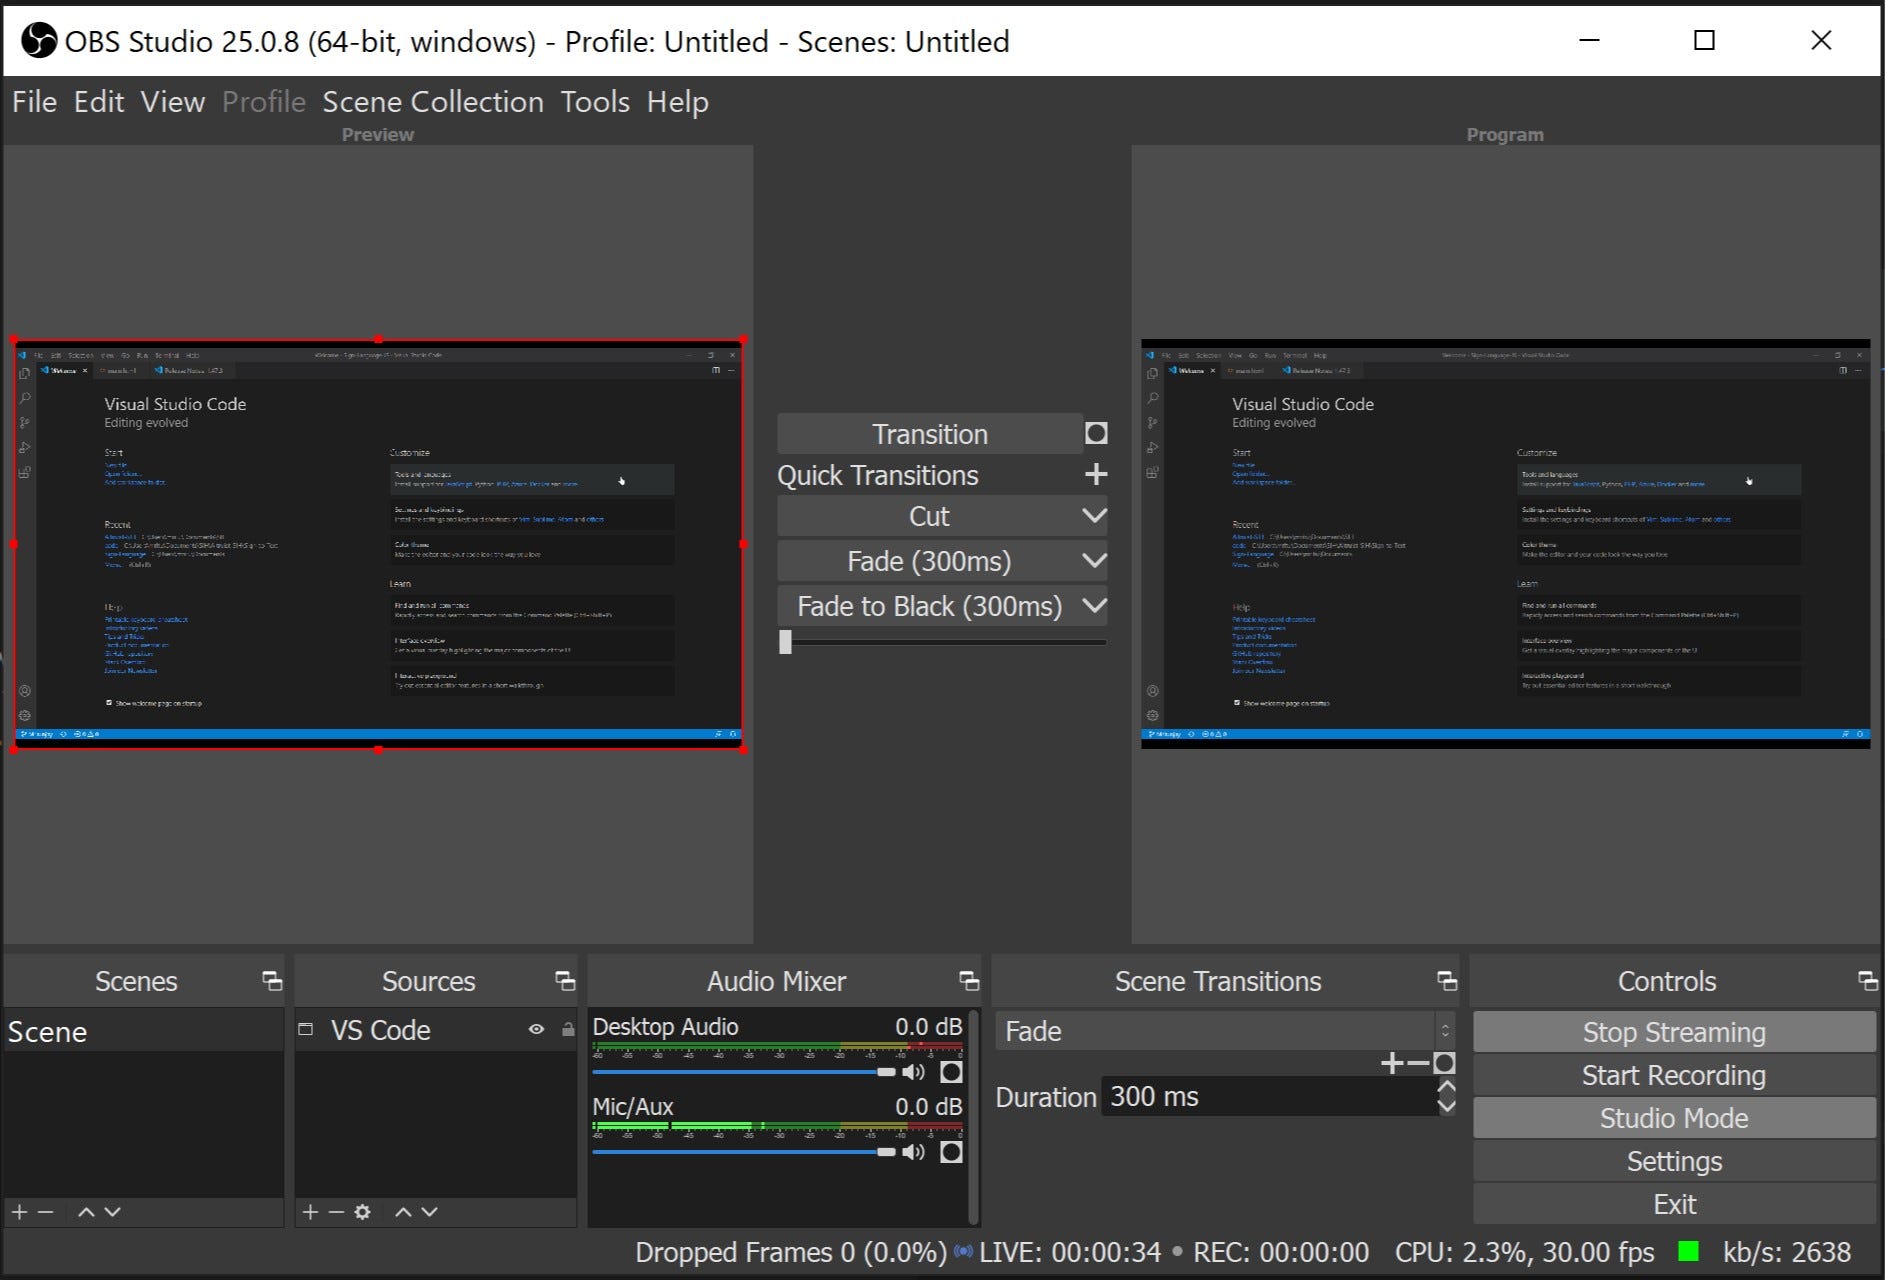
Step 7: Click on the Start Streaming option on OBS.
Step 8: Return to your browser where the YouTube Studio Control Room is opened. Click the ‘Go Live’ **option and wohoo! You are live!**
Thank you so much for reading the tutorial! I sincerely hope that will help you to start with OBS 😃
For any queries and feedback, you can post your responses below and as well as can reach out to me on :
Twitter: https://twitter.com/mritunjay394 (preferable)
Linkedin: https://www.linkedin.com/in/mritunjay394/